3D Wii Manipulation of Photos (WIMP)
WIMP User Guide


Before starting the program
-
There is a file called "config.dat" in the "WIMP/executable" directory. Some of the parameters needed to be modified so that you can run the program accurately.
Use Notepad or other text editors to open "config.dat".
- "screenHeight" is the height of your computer screen measured in mm.
- "sensorBarWidth" is the distance between the rightmost and the leftmost IR LEDs on the glasses, it is also measured in mm.
- "screenAspect" can be zero because the program will get the value automatically.
- "cameraIsAboveScreen" indicates whether your Wiimote will be placed above the screen or below the screen, set "True" if the Wiimote will be placed above the screen, "False" if the Wiimote will be placed below the screen
- Connect the Wiimote to your computer using bluetooth.
Running the program
After you just start the program, you need to put on the headset, stand in front of the Wiimote about 1 meter and then press "Space" to do calibration.
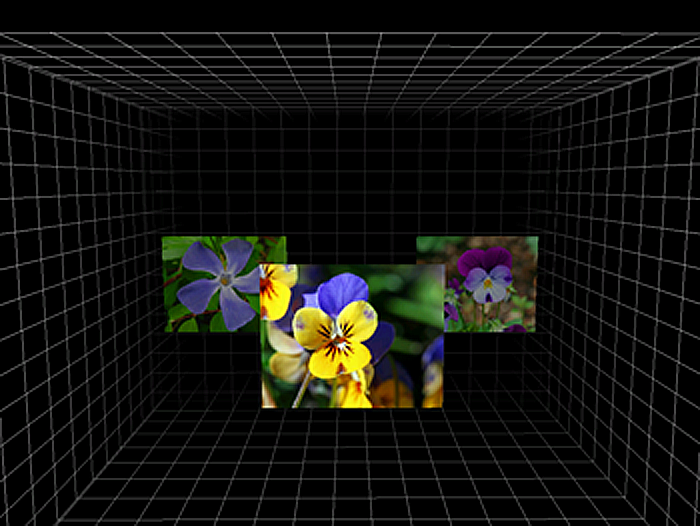
This program can be divided into three levels: folder selection, photo selection and photo view.
In these three levels, you can move your head to make the 2D scene become 3D when you are wearing the headset.
In addition, you can use the IR LED pen to peform different kinds of gesture in order to operate the WIMP program. Below are three sample gestures, LEFT, UP and LEFTUP:


 Note: LEFT means you stand in front of the screen, use the IR LED pen to point to the Wiimote, press and hold the switch, then move your hand leftwards and release the switch.
LEFTUP means you stand in front of the screen, use the IR LED pen to point to the Wiimote, press and hold the switch, then move your hand to top-left and release the switch.
Others have similar meaning.
The operations for different levels are listed below.
Special operation:
Note: LEFT means you stand in front of the screen, use the IR LED pen to point to the Wiimote, press and hold the switch, then move your hand leftwards and release the switch.
LEFTUP means you stand in front of the screen, use the IR LED pen to point to the Wiimote, press and hold the switch, then move your hand to top-left and release the switch.
Others have similar meaning.
The operations for different levels are listed below.
Special operation:
LEFT demonstration
UP demonstration
LEFTUP demonstration
-
Folder selection level

- LEFT and RIGHT: switch folders
- UP: select the front folder
-
Photo selection level

- LEFT and RIGHT: switch photos
- UP: select the front photo
- DOWN: back to previous level (folder selection level)
-
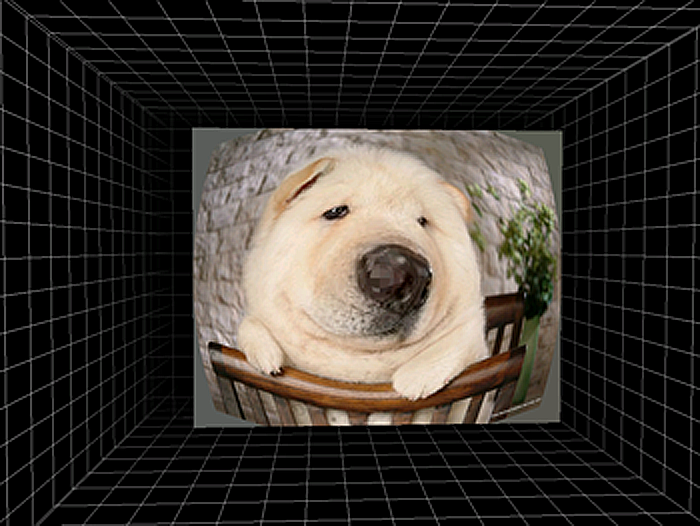
Photo view level (Can apply different image effects to your photos)
- DOWN: back to previous level (photo selection level)
- UP: invert the photo color
- RIGHTUP: increase photo brightness
- LEFTDOWN: decrease photo brightness
- RIGHT: fish eye effect
- LEFT: pixelate effect
- LEFTUP: "water" effect
- RIGHTDOWN: swirl effect


- Press "Esc" to exit the program
- Press "R" to reset the photo when you want to undo all the image effects applied to the photo
- Press "L" to switch to IR Display mode to check whether the Wiimote can detect the IR signals or not. Press "L" again to jump back to normal display.